
Filters give you the ability to query on data in Trustee Suite; you can make your filter as simple or as complex as you need with the Filter Builder screen. When you create a new filter it is permanently saved in the filter list on the Filter Maintenance screen for future reference. Follow the steps below to create a new filter.
To Create a New Filter:
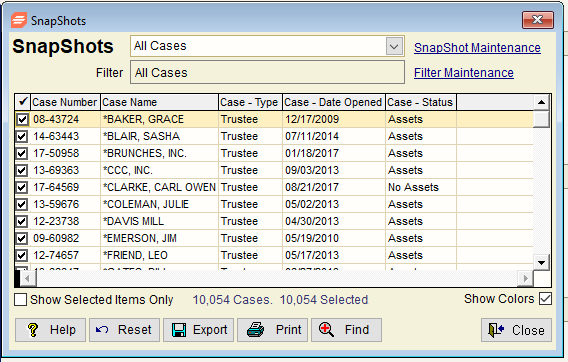
- From the Trustee Suite Main Menu toolbar, select ‘SnapShots’, which invokes the SnapShots screen as shown below.
- Click on the ‘Filter Maintenance’ button in the upper right corner of the screen, which invokes the Filter Maintenance screen shown below.

- Single click on a Filter Name from the grid and click on the ‘New’ button on the right side of the screen, which generates the New Filter pop-up window (shown below), giving you two options.
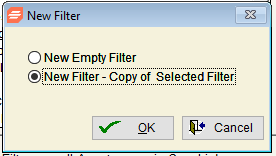
- New Empty Filter: Selecting this option will create a new filter from scratch.
- New Filter – Copy of Selected Filter: Selecting this option, as shown below, will use the same query from the filter that is currently selected in the Filter Maintenance screen. Choosing this option can save you time when you want to create a new filter that uses most of the fields of a pre-existing filter. After selecting ‘New Filter – Copy of Selected Filter’, click on ‘OK’. The Case Filter Builder screen will appear with the ‘General’ tab selected, as shown below. The ‘General’ tab displays basic case fields and dates from which you can select. If you need to filter on additional fields that are not displayed in the ‘General’ tab, click on the ‘Advanced’ tab at the top of the Case Filter Builder screen, as shown in the top right of the screen.
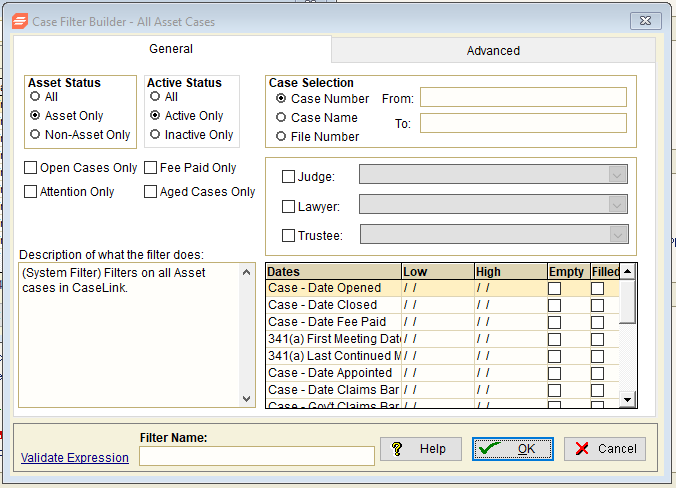
- When you have entered the fields for your filter, enter a description of the filter that you just created on the left side of the screen under the ‘Description of what the filter does:’ header.
- Select ‘OK’.
- The Filter Type window will appear (shown below); select ‘This is a permanent filter that I will name’.

- Select ‘OK’, which invokes the Filter Name pop-up window shown below.
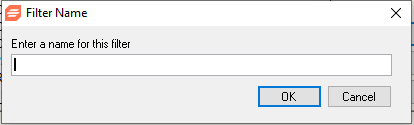
- On the Filter Name window, type the name of your new filter in the field provided and select ‘OK’. If you have pre-defined your filter in the Filter Name field of the Case Filter Builder screen, this name will be displayed.
- Your new filter has been added to the filter list and is highlighted in gray. To run your filter, click on the ‘Select’ button.
- The application will return to the main SnapShots screen (shown in the first screenshot above) and your new filter will be applied to the selected SnapShot at the top of the screen in the ‘Filter’ field above the grid.