
Trustee Suite has expanded its ECF functionality into Case Import. ECF customers have an opportunity to receive their new case information alongside their ECF documents. This provides case imports into the Trustee Suite system as soon as the case has been assigned to the trustee.
After a successful Fetch, the case information will be available for review from the Case Import from ECF screen.
You may then import cases into Trustee Suite, map any entries that do not match your Professional List entries, validate the cases and print case import reports.
Open ECF Case Import
This screen is available from three locations within Trustee Suite:
1. From the ‘Case Import’ link sub-menu:
• Click on the ‘Case’ tab from the Form Selection toolbar on the far left side of the screen.
• Click on the ‘Case Import’ link from the Case sub-menu beneath the tabs on the far left side of the screen.
2. From the top Main Menu toolbar (File Menu), select ‘Import’ > ‘Case Import From ECF’.
3. From the ‘Retrieve’ button in Document Management:
• Click on ‘Document Management’ from the Trustee Suite Main Menu toolbar.
• Click on the ‘Retrieve’ button,  , which invokes the Document Management | Retrieve screen as shown below.
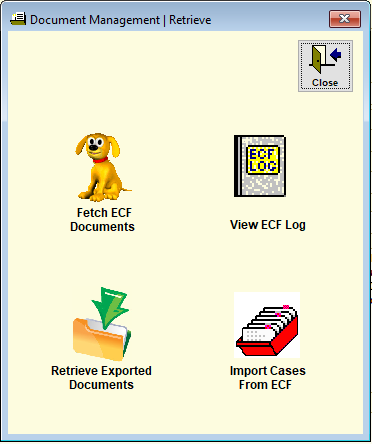
• Select the ‘Import Cases From ECF’ option, which invokes the screen shown below.
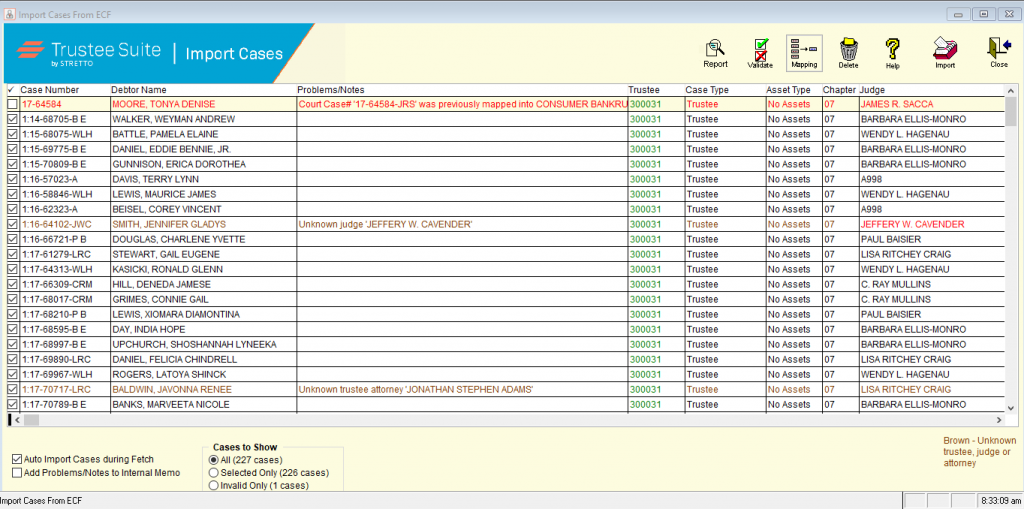
All fields can be edited from the Import Cases From ECF screen and the new values will be imported into Trustee Suite. If you decide to close the screen before importing the edited case information you will be prompted to save the updates.
TIP – Check the Problems/Notes column to quickly locate errors or potential problems with the file.
Case Import information columns can be viewed by clicking on the horizontal scroll bar to pan the screen.
You can also click on the columns to change the sort order in the grid.
Additionally, you can resize the column width and drag the columns to the order that you wish to view them. The Import Cases From ECF screen columns and options are as follows (Note: If “unchecked”, the record will turn red and become shaded meaning the case is invalid; see the ECF Case Import Validate page of this Help File.):
• Case Number: Displays the case number to be imported.
• Debtor Name: Displays the name of the debtor. This field is pre-formatted in “last name first” order.
• Trustee (drop-down menu): Displays the number associated to the Trustee assigned on the case.
• Problems/Notes: This column displays the results of the initial or most recent validation. Any errors or potential problems are noted in this column. A common “problem” shows the Debtor’s Attorney name is “invalid” or “unknown”. This means that either a new name needs to be added to your Professionals List, or a valid name should be selected. You can easily add or choose a name from your Professionals List directly from the Case Import screen. See the “Mapping” section below for detailed instructions.
• Any messages contained in the Problems/Notes column of the Import Cases from ECF screen will appear in the Case Internal Memo.
• The Problems/Notes column will be updated when “Validation” is re-run.
• By clicking on ‘Import’, the import file is automatically re-validated.
• Additional Columns: In addition to the standard grid columns shown in the Import Cases from ECF screen, there are more columns available on the screen. The other grid columns include all of the information that can be gathered from the case docket and include:
• Case Type (select from the drop-down)
• Asset Type (select from the drop-down; Asset or No Asset)
• Chapter (select from the drop-down)
• Judge (select from the drop-down)
• Debtor Attorney (drop-down), Debtor Attorney Company, Debtor Attorney Addresses (1 and 2), City, State, Zip Code, Telephone Number, Fax Number (nine columns)
• Trustee Attorney (select from the drop-down)
• IFP (checkbox)
• Fee Paid? (checkbox)
• Fee Paid $
• Fee Paid Date
• File Number
• Debtor TIN, SSN, Addresses (1 and 2), City, State, Zip Code, Telephone Number, Fax Number (nine columns)
• 341 Memo
• Added Date
• Open Date
• Open Reason (select from the drop-down)
• Date Closed
• Close Reason (select from the drop-down)
• 341(a) Meeting, Time, Rank, Cont. Date, Cont. Time (five columns)
• Appointed Date
• Claims Bar Date
• NDR Date
• Est. TFR Date
• Actual TFR Date
• TDR Date
• Conv. Pet. Date
• Discharged Date
• Bond Type (select from the drop-down)
• Bond Amount
• Bond Exp. Date
• Print Rolodex (checkbox)
• Print Ext. Memo (checkbox)
• Attention
• Active (checkbox)
• Inactive Reason
• 2nd Debtor Name, SSN, Addresses (1 and 2), City, State, Zip Code, Telephone Number, Fax Number (nine columns)
• 3rd Debtor Name
• 4th Debtor Name
• Court ID
• Cases to Show: The Cases to Show box that appears just below the grid allows you to filter the cases displayed above.
• All (x cases) – Displays all records currently in the import table. The number in parentheses gives a total count of all records.
• Selected Only (x cases) – Only displays cases with a P in the selected column. The number in the parentheses gives a total count of all records that meet these criteria.
• Invalid Only (x cases) – Displays invalid records only. The number in the parentheses gives a total count of all records that meet these criteria.
• Auto Import Cases during Fetch – Select this checkbox if you want to auto-import cases during fetch.
• Add Problems/Notes to Internal Memo – Select this checkbox if you would like to add issues/notes to the internal memo.
Case Import Options

- Report: This option enables you to see what cases were imported.
- Validate: When you open the Import Cases from ECF window the first time, all information is validated against the Trustee Suite database. Any errors or potential problems are noted in the Problems/Notes column. If corrections are made to the data, you should verify the effects of those changes by clicking on the ‘Validate’ button.
- Mapping: Click on the ‘Mapping’ button to activate the Case Import Mapping window. See more “Mapping” in the next section of this page for detailed information. Also see the ECF Case Import Mapping page of this Help File.

- Delete: Use the ‘Delete’ button to permanently remove the selected record from the import grid. If the option to ‘Show Invalid Cases’ is selected, all of the invalid records can be batch deleted by selecting the ‘Delete’ button.
- Help: Click on the ‘Help’ button to reveal the Import Help window. Clicking on the ‘Help’ button displays a legend explaining the different colors used in the Import Cases from ECF window.

- Import: Click on the ‘Import’ button to complete the import process into Trustee Suite. Only those records with a check in the ‘P’ column will be imported.
Note: When you click on ‘Import’, the import file is automatically re-validated.
- Close: Click on the ‘Close’ button to exit the Import Cases From ECF window. Closing before importing will not save the changes made to case information and mapping.
Mapping
Mapping the court’s information to the information stored in Trustee Suite will correct “Unknown…” or “Invalid…” problems that may appear in the Problems/Notes column of the Case Import screen. These problems may appear simply because the court’s information is entered differently than the information stored in your Trustee Suite Tables. For example, Trustee Suite will not recognize the values being imported when a Debtor’s Attorney name is spelled differently in the Professional List. Thus, will flag the attorney’s name as invalid.
Once you map a value, Trustee Suite will “remember” the mapping and use it automatically for future imports.
Validate / Case Validation
The case import validation process reviews the cases being imported for inconsistencies, unmatched values and required data fields that have been left blank.
Import
Select ‘Import’ after you have reviewed and validated your data.
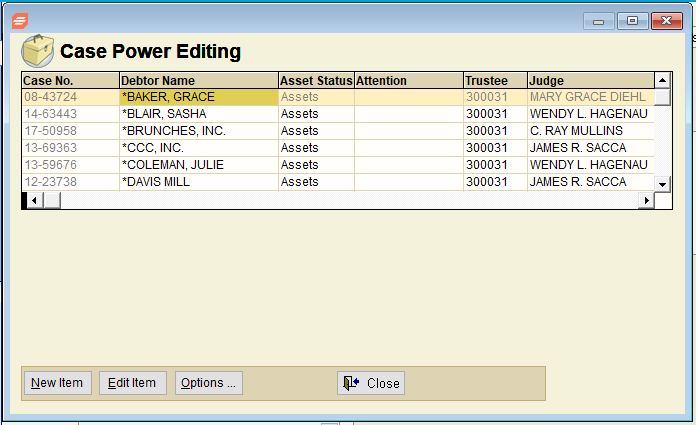
Once you complete the import, you will receive the following message: “x record(s) will not be imported. Do you want to continue?” If you answer ‘yes’, the following message will appear: “Import Complete. You imported x out of x record(s).” You may use the Case Information screen (accessed via the ‘Case’ tab from the Form Selection toolbar on the far left side of the screen) or Power Editing screen shown below (accessed via the top Main Menu toolbar (File Menu); select ‘Case Administration’ > ‘Case Power Editing’) to complete imported information.
Missing 341(a) Dates
There could be times when the 341(a) date is not available when the Case Import information is being retrieved from the court. In this situation, we will send the import information to you with the 341(a) date field blank. Stretto will continue to check if a 341(a) date has become available and, as soon as it is, will update that specific case record with the 341(a) date. You can import the case into Trustee Suite or leave it in the Import Cases From ECF screen; either way, the date will be updated.