Singe-Entry Remote Deposit Check Scanning (RDC) is a deposit scanning option for trustees who currently bank with East West Bank (EWB), Metropolitan Bank (METB), or TriState Capital Bank (TSCB) and use Trustee Suite. The single entry of RDC-type deposits will eliminate the need to utilize a bank-provided scanner or log in to a separate bank site to post deposits.
RDC Entry and Deposit
- Log in to Trustee Suite Desktop.
- Turn on and open scanner. Light on scanner should be blue with a smaller orange or blue indicator light.
- Endorse back of check. NOTE: The single-entry RDC program is for domestic checks only; the user cannot deposit foreign or international checks using the RDC program. If the user is unsure if the item meets this guideline, contact our Banking Team via the Support Center.
- Go to any case, select “Banking,” and then “Receipts Log” from the submenu.

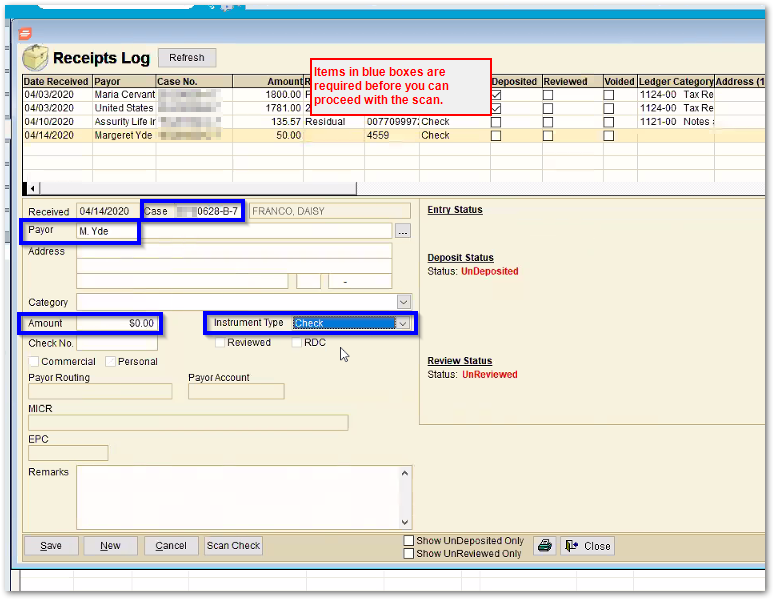
- Click “New” and complete the following fields in the Receipts Log entry screen:
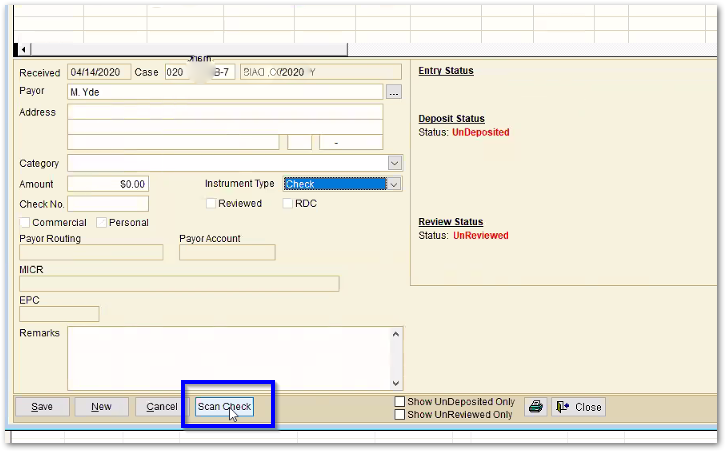
- Click “Scan Check” at the bottom of the screen.
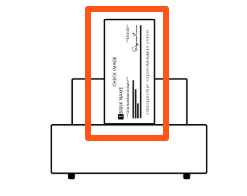
- Place check in the scanner face up with the MICR line on the right side.
A window with the deadline for making deposits and directions on how to load a check and scan will appear.
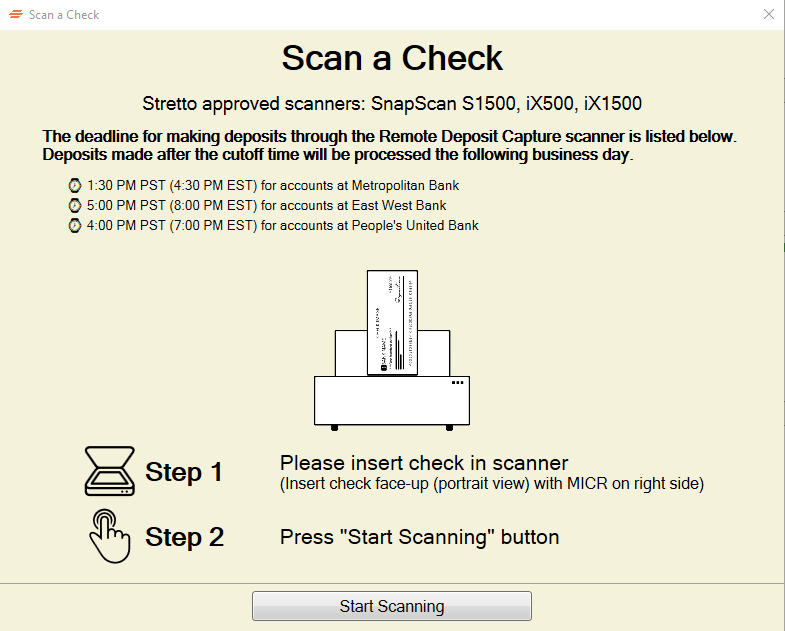
- Click “Start Scanning.” Payer Routing and Payer Account number will be auto-populated into the receipt form. If the MICR line information does not auto-populate, the user may enter it manually in the Payer Routing and Payer Account fields. An image of the check will also appear in the upper right area of the receipt.
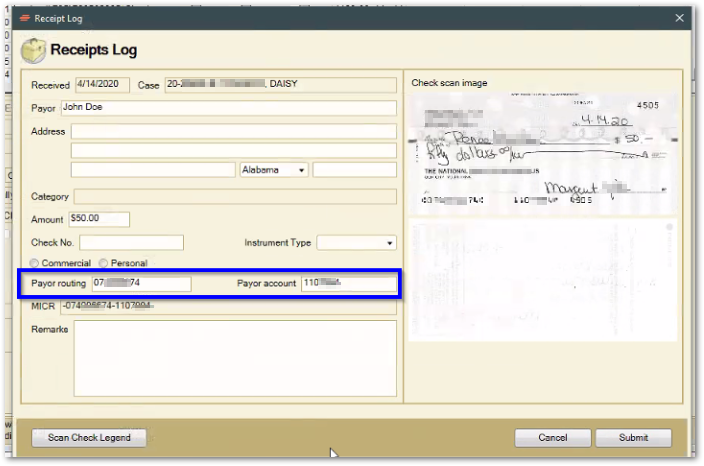
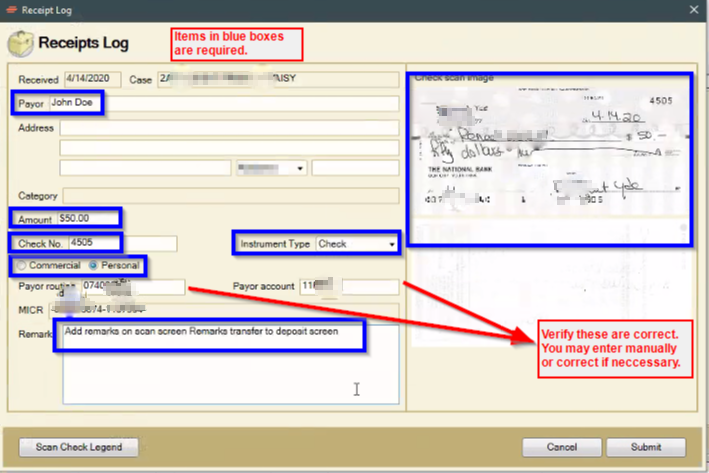
- Remove check from scanner to confirm receipt accuracy. The user is required to enter (E) or verify (V) the following fields (items in bold are required):
-
- Case (E)
- Payer (E) – who funds are received from
- Address – Address is not a required field. If the user enters any information in the address line, the user will be required to enter city, state, and zip.
- Amount Received (E)
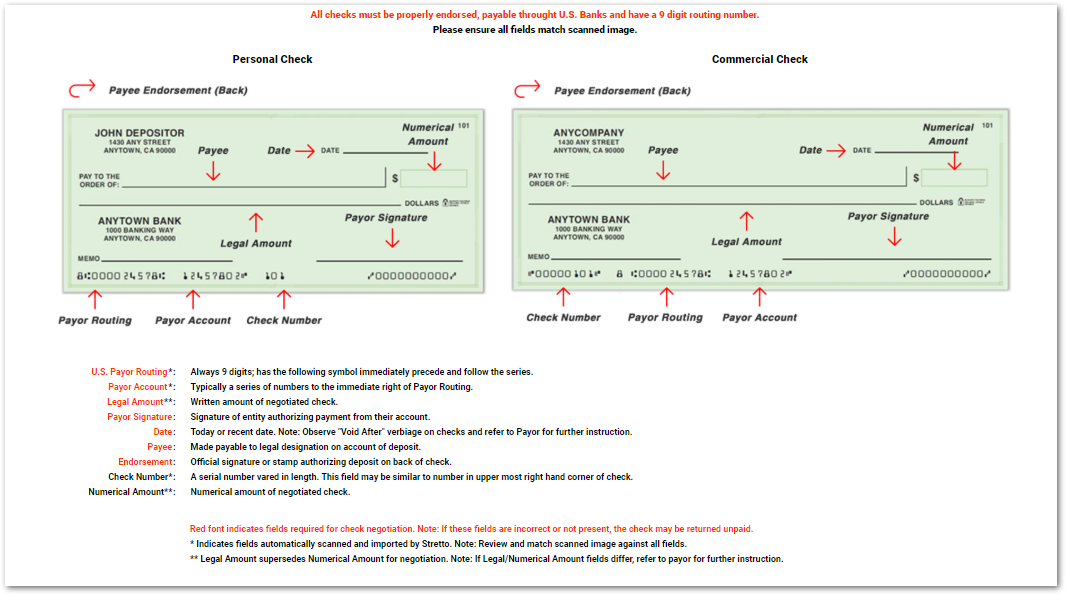
- Check Number (E or V)
- Instrument Type (E) – This includes the Commercial or Personal
- Payer Routing (V) – This number must match MICR line on deposit item.
- Payer Account (V) – This number must match MICR line on deposit item.
- MICR – This line is scanned and cannot be edited. If it does not match the check, the user may still move forward with the receipt and deposit of the item as this information is not transmitted to the bank.
- Receipt Log Remarks – Remarks are not required. If the user enters a comment, it will transfer to the deposit screen.
Please see check legend image below.
- Once all required fields are entered and/or verified, click the “Submit” button.
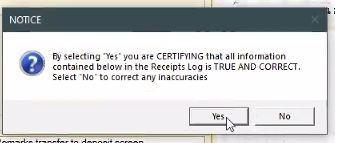
- A certification notice will appear. Read the notice and certify that all information is correct. If the client is certain all information is accurate, click “Yes.” If the client needs to make corrections, click “No” to go back and do so.
NOTE: The bank will be tracking error rates on all RDC deposits. If a user has a high error rate, the bank may revoke his or her RDC privileges. Users are REQUIRED to verify that the data is accurate, whether scanned or manually entered.
Other warning messages may appear. Please contact the Banking Services Team with questions regarding any error message received.
- Once the user clicks “Yes” the Receipt Log screen will reappear. Click the “Refresh” button at the top of the screen.
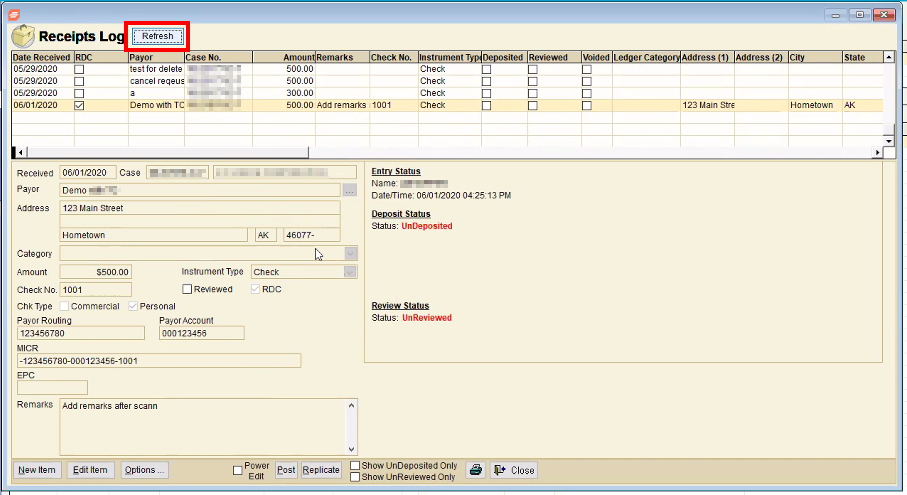
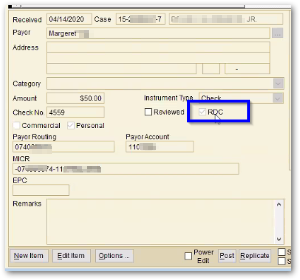
Note that the entry is now designated as an RDC deposit:
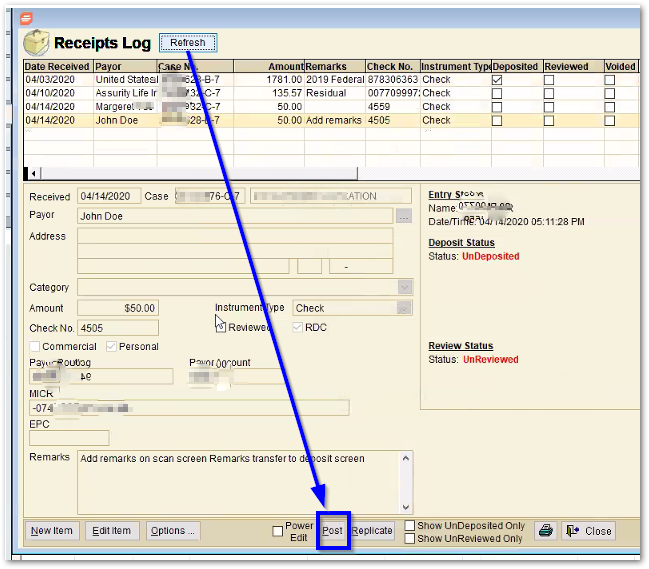
- After clicking “Refresh” in the previous step, click “Post” at the bottom of the screen to process the deposit.
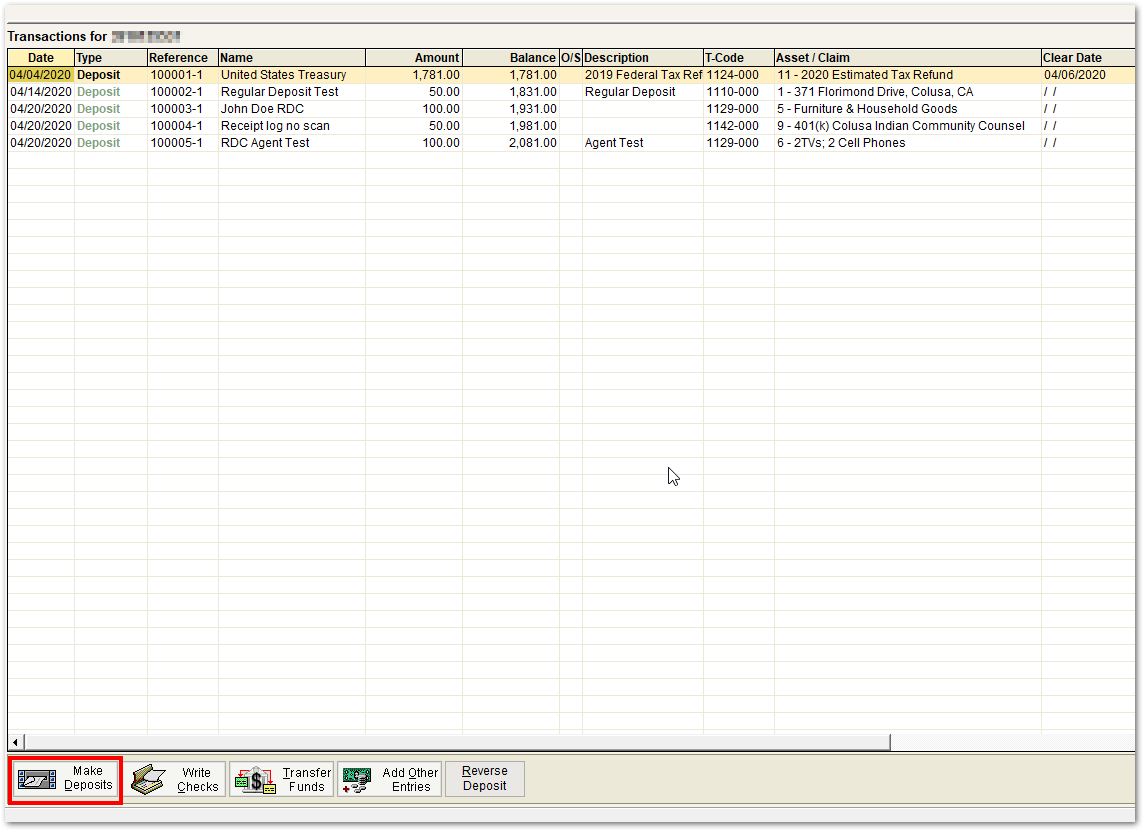
- The Banking Ledger screen will open. Click the Make Deposits button at the bottom of the screen.
- The Deposit screen will open. Link the receipt you created by choosing the “Receipt” button. This will pull scanned information into the Deposit screen.
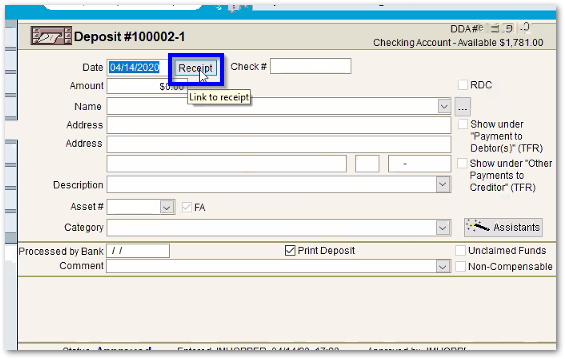
- Complete the required Deposit screen fields such as adding a Form 2 Transaction Description, selecting a UTC code, or linking to an asset, etc. Click save.
- Repeat steps 3 through 16 until all deposit items have been scanned. The user may only scan one item at a time and cannot combine deposits.
- Choose either “Print Now” or “Add to Batch.”
- The user can print deposits using the shortcut in the lower left menu while in the Banking tab or by going to Reports and Print Deposits in the top menu bar. Users do not need to use the MICR toner cartridge as the original deposit slip will not be forwarded to the bank.
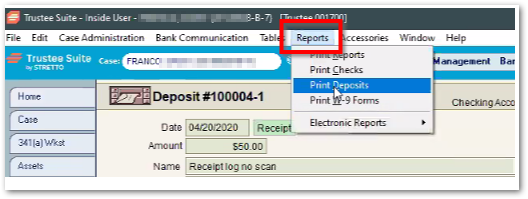
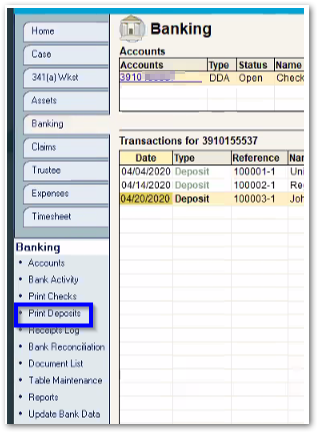
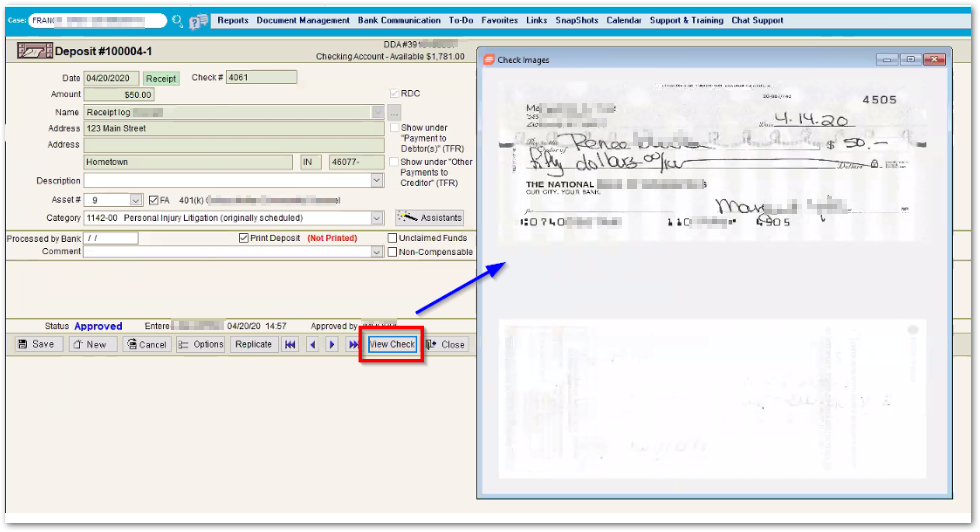
- The user may view the scanned image inside of the deposit screen.
Using the Home Screen Banking Alert with RDC
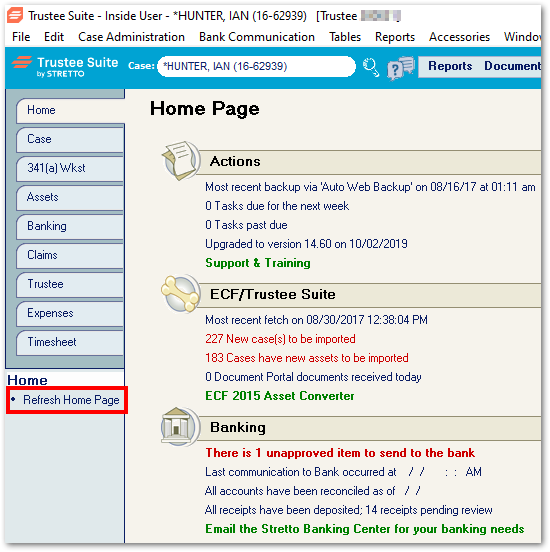
Banking alerts on the Home screen work the same for users on single-entry RDC. The alert showing “X receipts have been deposited, X receipts pending review” will update for RDC users.

However, users will need to click the Refresh Home Page link on the Home screen to make sure the most recent data is reflected in the alert.
RDC Reports
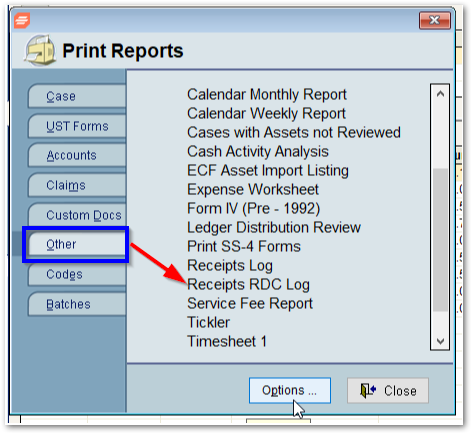
An RDC Receipt Log Report has been created to allow the user to pull a separate entry of RDC receipts (Reports, Other, Receipts RDC Log). The user will still need to make a photocopy of the check and place in the bank file (along with the deposit slip) for each case.
Check Destruction Log
Users are required to keep all items deposited via RDC for 14 days before destroying. The suggested procedure is as follows:
- Place the original RDC scanned check, money order, or other instrument in a lockbox or other secure location and hold for 14 days. The back of the check should be properly endorsed with a notation that the deposit was made electronically.
- Keep a log of deposited items that the user is holding pending destruction. The log should contain:
- Deposit date
- Payor
- Check number
- Amount
- Destruction date
The user may keep an electronic log and/or utilize Trustee Suite to house this information.
Destroy check in a secure manner after 14 days have passed. Please contact your Regional Director or Client Services for questions regarding destruction policies and procedures.
