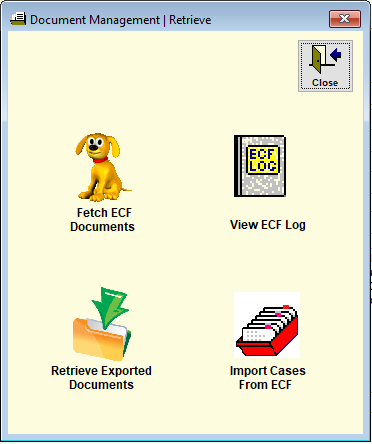
Located in the upper right corner of the Document Management screen is the ‘Retrieve’ button,  . This is a direct link to many ECF-related features and should be used as a command center for your ECF activities. From the Document Management | Retrieve screen, invoked by clicking on the ‘Retrieve’ button, there are buttons that enable you to ‘Fetch ECF Documents’, ‘Import Cases From ECF’, ‘Retrieve Exported Documents’ and ‘View the ECF Log’.

Fetch ECF Documents
Selecting this button will start downloading ECF documents into your Document Management folders. It is exactly the same procedure that you follow when you manually select the ‘Fetch’ button from the ECF Fetch shortcut on your desktop. When selected, the ECF Fetch window will be displayed and begin the downloading process; once it has completed downloading, a message will appear with an overview of the download.
The ECF Fetch screen (shown below) is displayed after clicking on the ‘Fetch ECF Documents’ button shown in the third screenshot below.

Import Cases From ECF
Using the ‘Import Cases From ECF’ button (shown in the second screenshot below) allows ECF customers to receive their new case information alongside their ECF documents. This functionality makes it possible to import cases into the Trustee Suite system as soon as the case has been assigned to the trustee.
Retrieve Exported Documents
Trustee Suite gives you the flexibility to export your Document Management documents to a specified location. The ‘Retrieve Exported Documents’ button, which invokes the screen shown below, enables you to import those documents that have been previously exported using the ‘Export’ button in the upper left corner of the Document Management screen above the grid while in the Selected View. Any annotations or comments that were added to the exported documents will be imported back into Document Management and displayed in the Selected View.

The Retrieve Exported Documents window enables you to import annotations and comments added to documents.
To import your previously exported documents, follow these simple instructions:
1. Click on the ‘Retrieve’ button,  , in the upper right corner of the Document Management screen (the first screenshot shown above).
2. Click on the ‘Retrieve Exported Documents’ button in the bottom left corner of the Document Management | Retrieve screen.

3. Select the location of the documents that you wish to retrieve and enter it in the field provided. If you exported your documents to a CD, ensure you insert the CD into your CD drive. Please note, this field will automatically default to the location of your last export.
4. Select the ‘Save’ button. Only the documents and comments that have updates will be imported back; you will be prompted with the exact numbers once you click on ‘Save’.
View ECF Log
The ECF Log Report (shown below), generated by clicking on the ‘View ECF Log’ button, is a tool to help track all of the items transmitted during Fetch.

