System and Custom Dates can be accessed from the ‘Dates’ tab on the Cases screen invoked via clicking on the ‘Cases’ tab on the Form Selection toolbar on the far left side of the page. From the ‘Dates’ tab, users can control what dates display for the individual case.
Custom Dates can also be used in the following features in Trustee Suite:
- Filtered Timeline Report
- To-Do List
- SnapShots
- Merge Reports
Some Custom Dates are events that are tracked in Pacer, and can be automatically imported through special setup. In Pacer, these dates have a dedicated event, or contain specific docket text that Stretto can decipher. Contact the help desk at (800) 634-7734 to determine if your custom date can be automatically imported.
Accessing Case Administration Dates
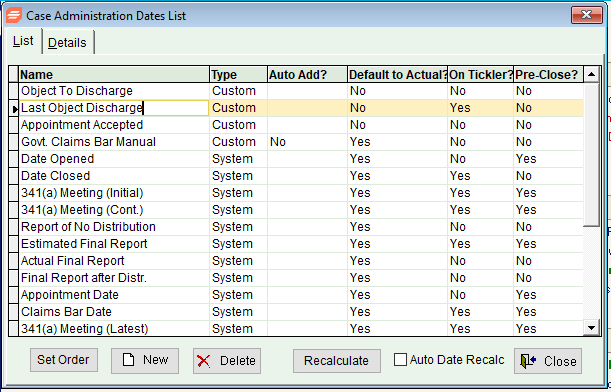
From the top Main Menu toolbar (File Menu), select ‘Tables’ > ‘Setup Tables’ > ‘Case Administration Dates’, which invokes the Case Administration Dates List screen shown below. There are two tabs: The ‘List’ tab reveals the dates available for display within Cases/Dates, while the ‘Details’ tab displays the parameters for the date.

New button: Click to create a Custom Date.
Delete button: Click to remove a Custom Date.
Note: System dates are required in Trustee Suite and cannot be deleted.
Editing and Configuring Case Administration Dates
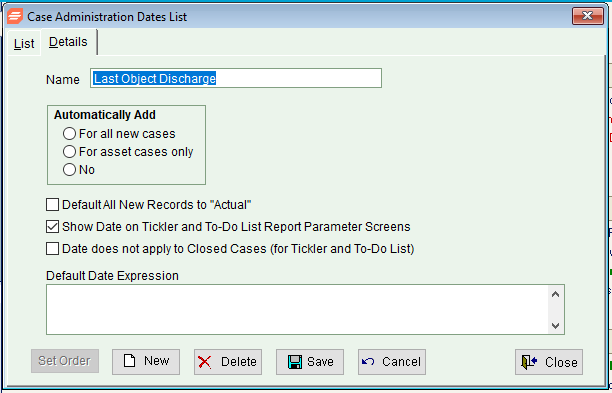
The user must determine whether the new date will be added for all new cases, only asset cases or manually on a case by case basis. Select the appropriate radio button from the Automatically Add section in the screen shown below to choose.
Default All New Records to “Actual”: Selecting this option will leave the date field blank so it can be entered by the user.
Show Date on Tickler and To-Do List Report Parameters Screen: Selecting this option makes this date available for display in other Trustee Suite features.
Date does not apply to Closed Cases (for Tickler and To-Do List): Selecting this option ensures this date is not displayed on closed cases.
Default Date Expression: Right click in this field to choose dates on which to perform calculations. For example, choose ‘341(a) Meeting date (+) 1 (day)’ to create an Exemption to Objection deadline Custom Date. Users can also enter a (-) sign to enter the date a set number of days prior to the calculated date chosen.

Setting the Order
Users can set dates by clicking on the gray box(es) just to the left of the date description(s) (in the pane with the scroll bar on the right side of the screen shown below) and drag and drop to reorder in the order preferred. Also, users can utilize the ‘Record Order’ or ‘WordPerfect Extract No.’ (radio button options) for sorting.

The “Dates” Tab
In the Case Information screen shown below (accessed via clicking on the ‘Cases’ tab from the Form Selection toolbar on the far left side of the page), click on the ‘Dates’ tab to invoke the Dates grid on the right side of the screen. To add a date(s), click on the ‘Add Date’ button, which invokes the Select a Date screen shown below. Highlight a date(s) (hold down the ‘Ctrl’ button on your keyboard to select multiple dates) and click on the ‘Add’ button to add the date(s) to the Dates grid.

